.png)


Knowing how to tie different knots is always hand and can be important in scuba diving, whether it's on a dive boat, attaching a new piece of equipment or sending a sunken bit of treasure to the surface using a lift bag, it is always good to know how to tie the right knot. So, with this in mind below is a step by step guide on how to tie the 4 most common knots in scuba diving and at the bottom is a link to the YouTube video of the online class we ran taking you through how to tie the knots for you to watch. We will be going through the bowline, sheet bend. two half hitch, and the reef knots in a step by step and easy to understand way.
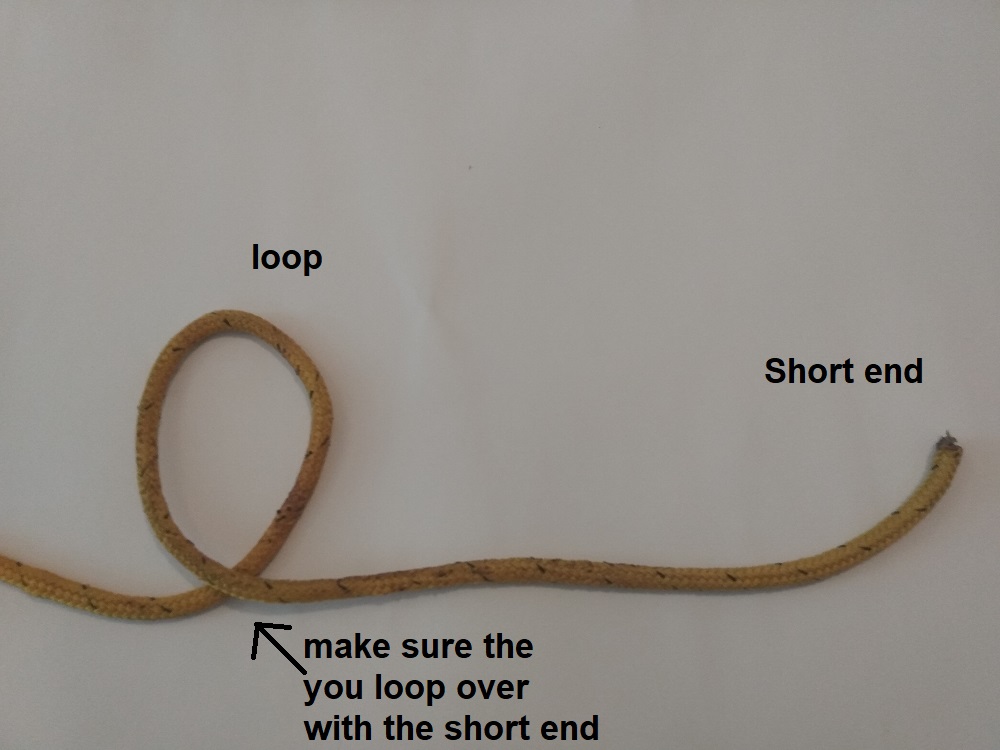
Bowline
(for making a fixed loop at the end of a rope)
1. Make a loop in the line going over the top of the main line with the short end.
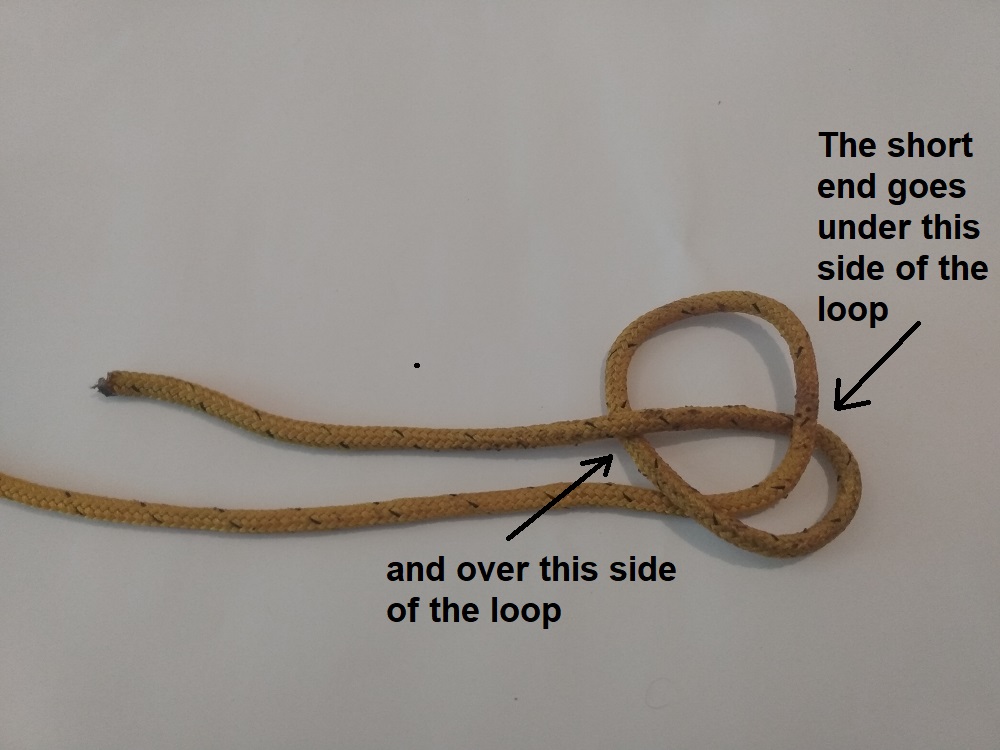
2. Take the short end and pass it through the loop so it goes under the nearest edge and over the far edge of the loop.
3. Pass the short end under the main piece of rope.

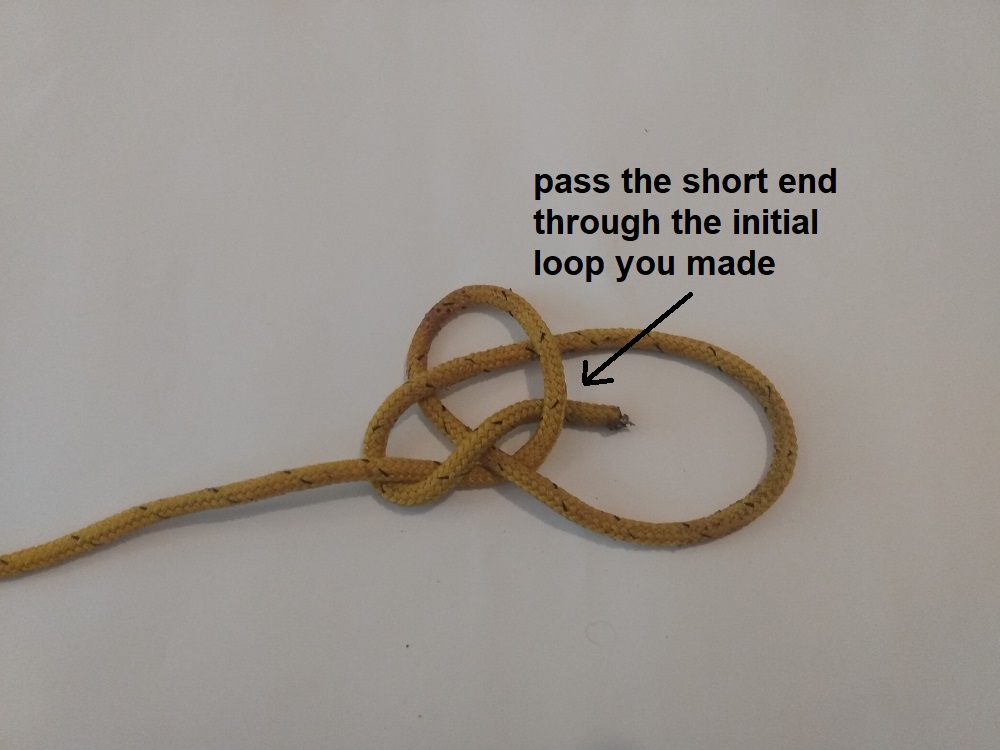
4. Pass the short end back through the initial loop you made.
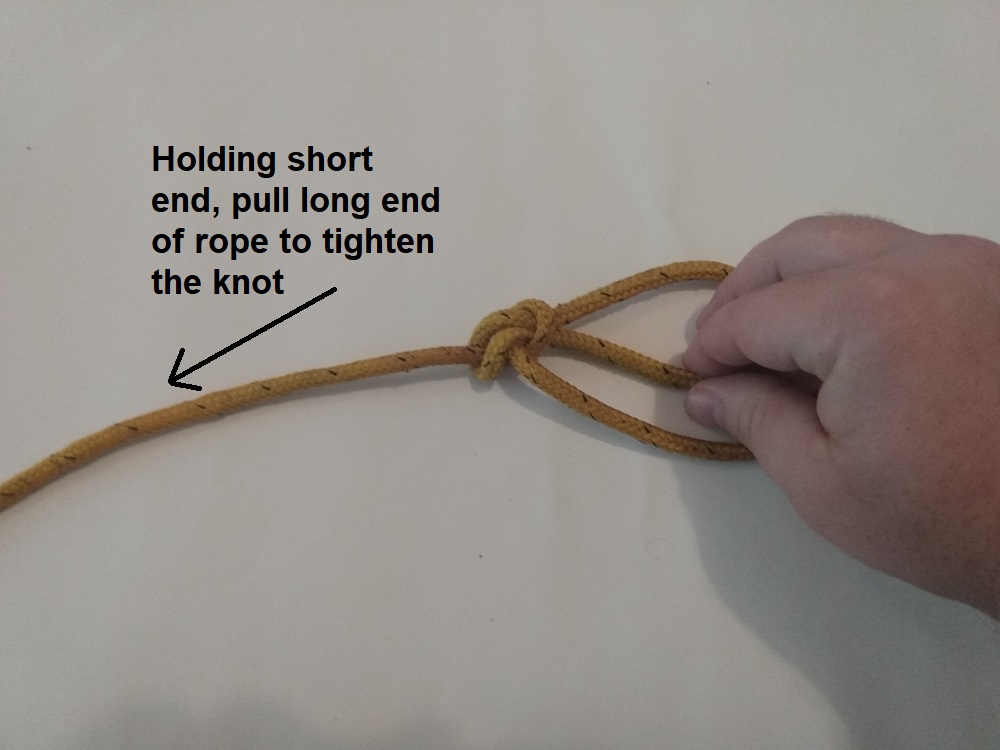
5. place your hand in the second loop you made to hold it in place and pinch the short end.

6. Pull both the main piece of rope and the short end away from each other to pull the knot tight and there you have a bowline knot.
Sheet bend
(For joining two ropes together)
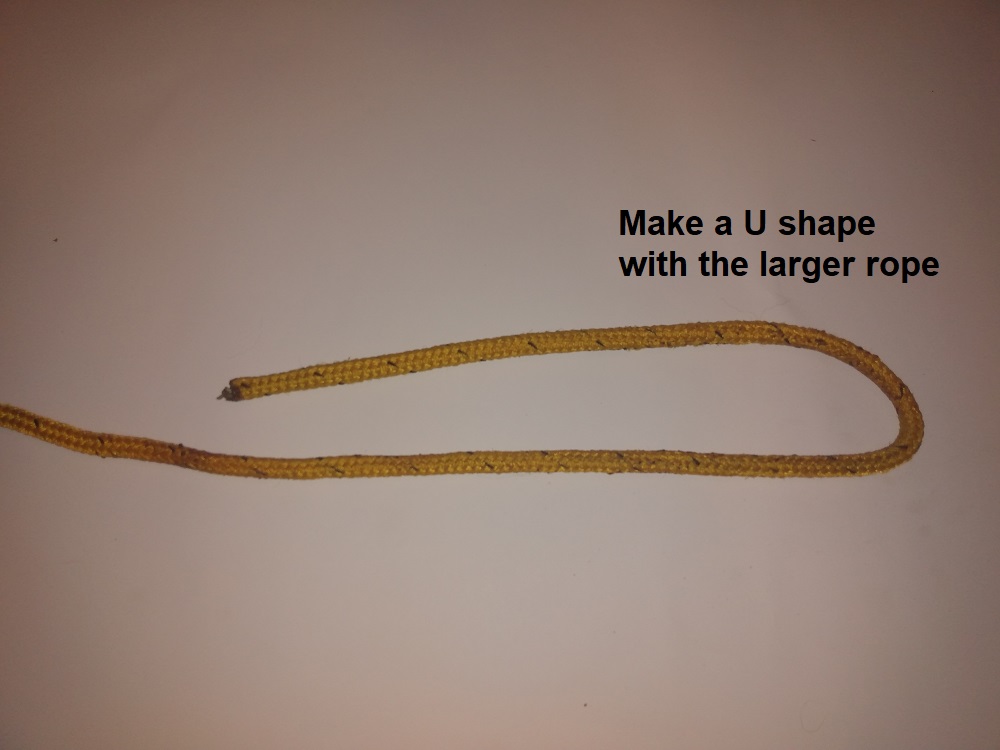
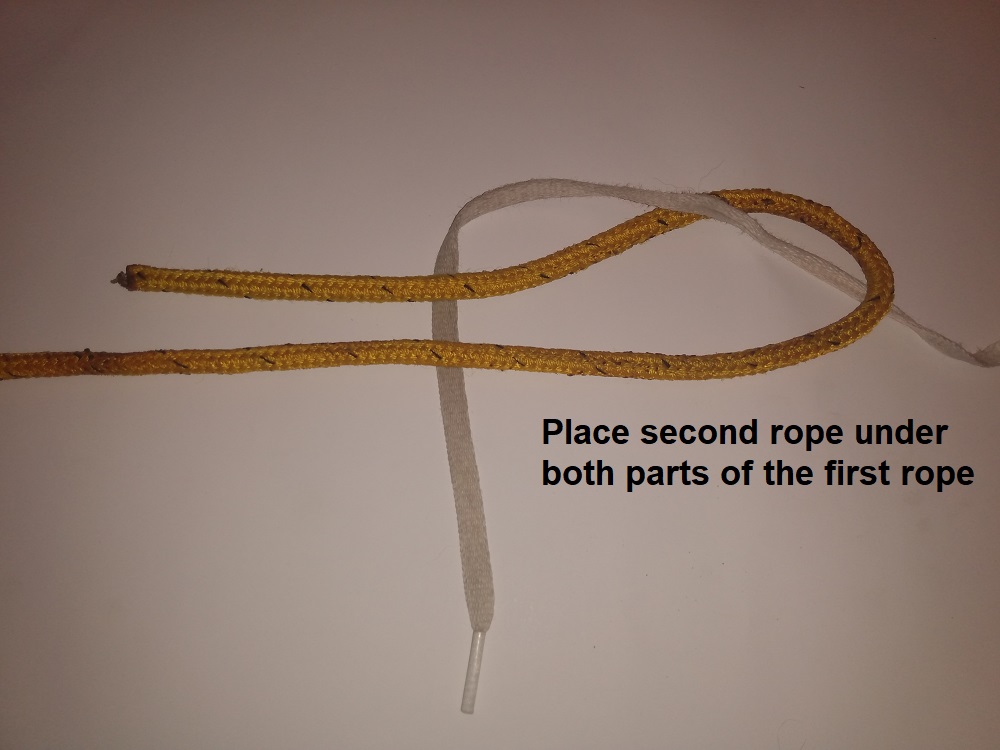
1. Make a U bend in the larger piece of rope (if the ropes are the same size then it doesn't matter which rope you use).
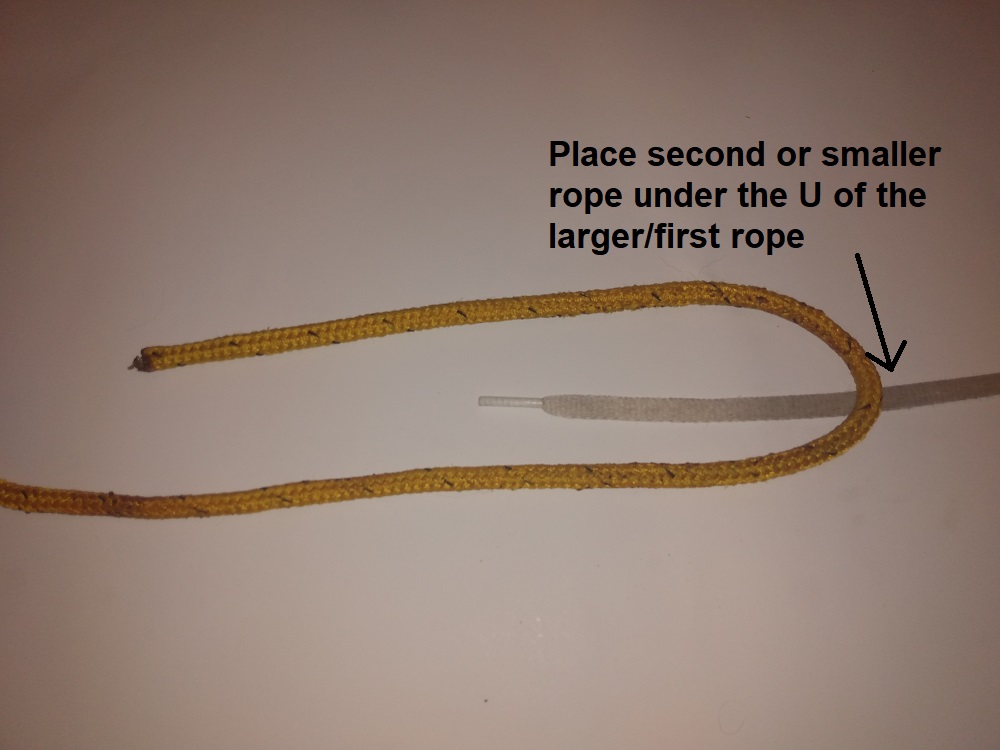
2 Put one end of the smaller rope under the bend in the larger rope which you just made.
3. Place the smaller rope around and under the two parts of the U in the larger rope.
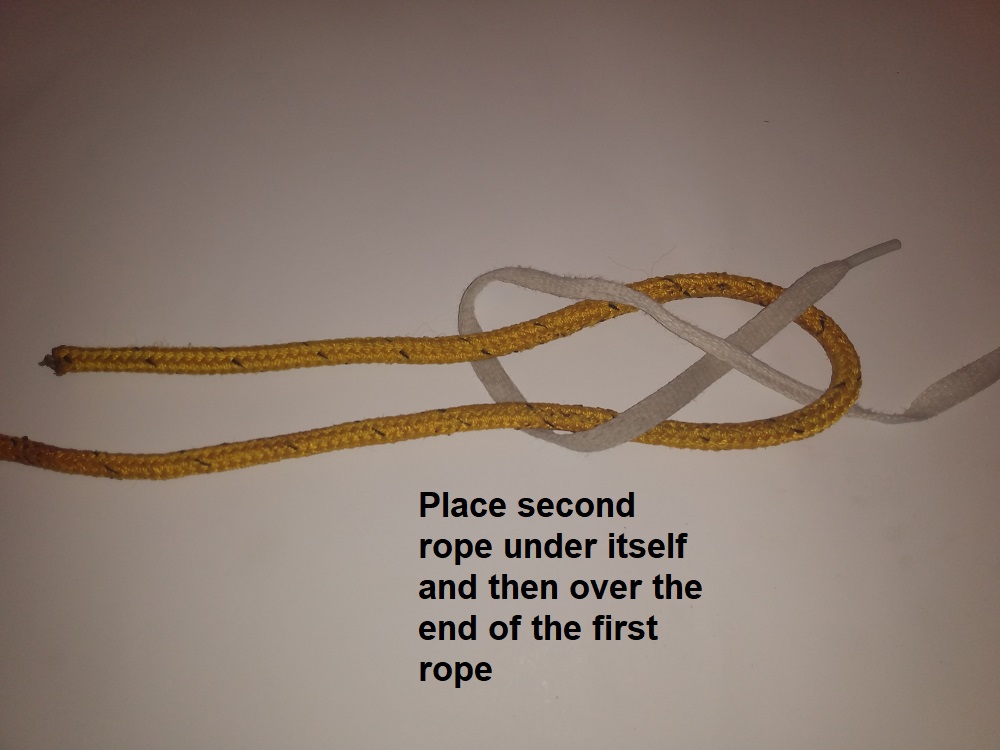
4. Place the end of the smaller rope under the part of the smaller rope still in the bend but on top of the larger rope.
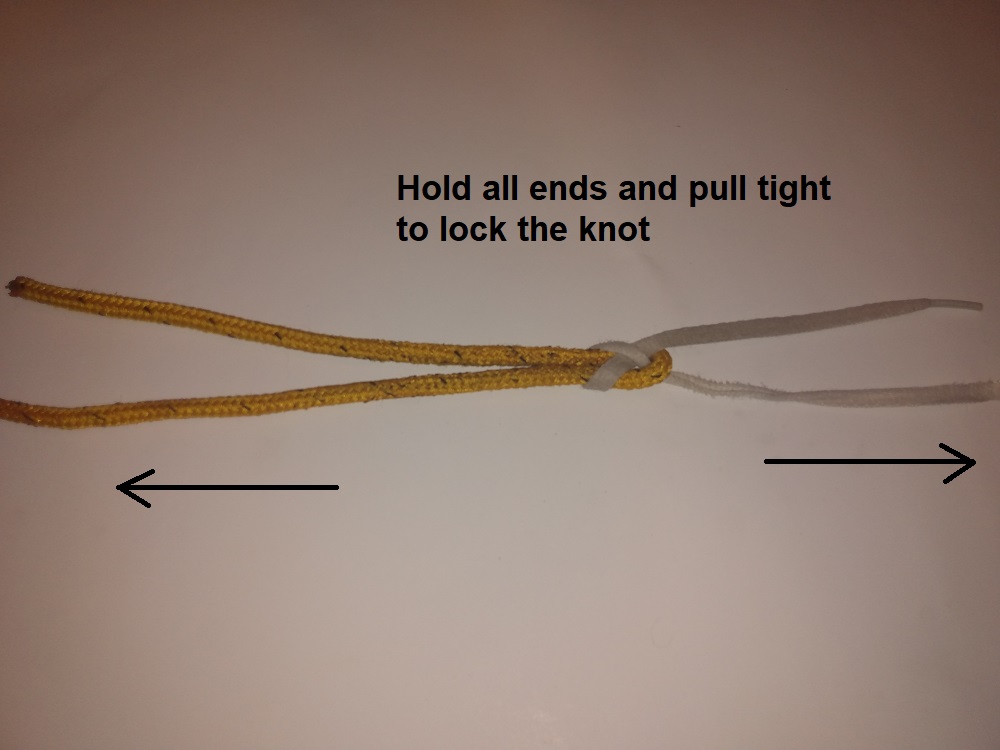
5. hold all 4 parts of the rope and pull away from each other to tighten the knot.
Two half Hitch knot
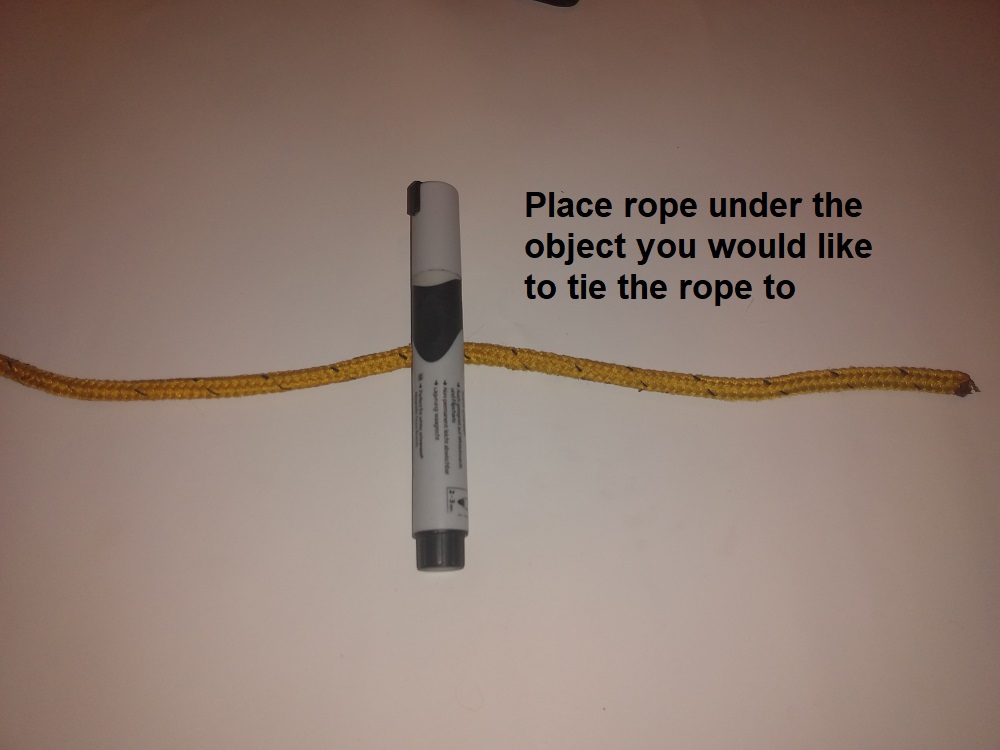
(Used to tie a rope to a solid object i.e. metal pole or a tree)
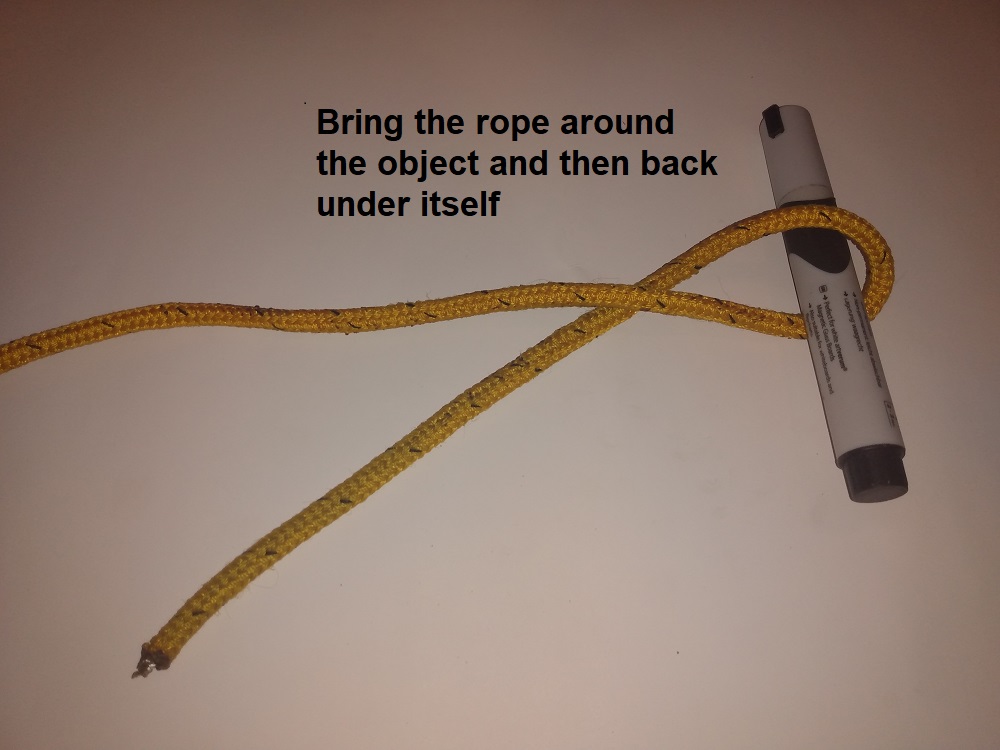
1. Pass the rope under the object you wish to tie it too.
2. Pass the top over the object and back under itself.
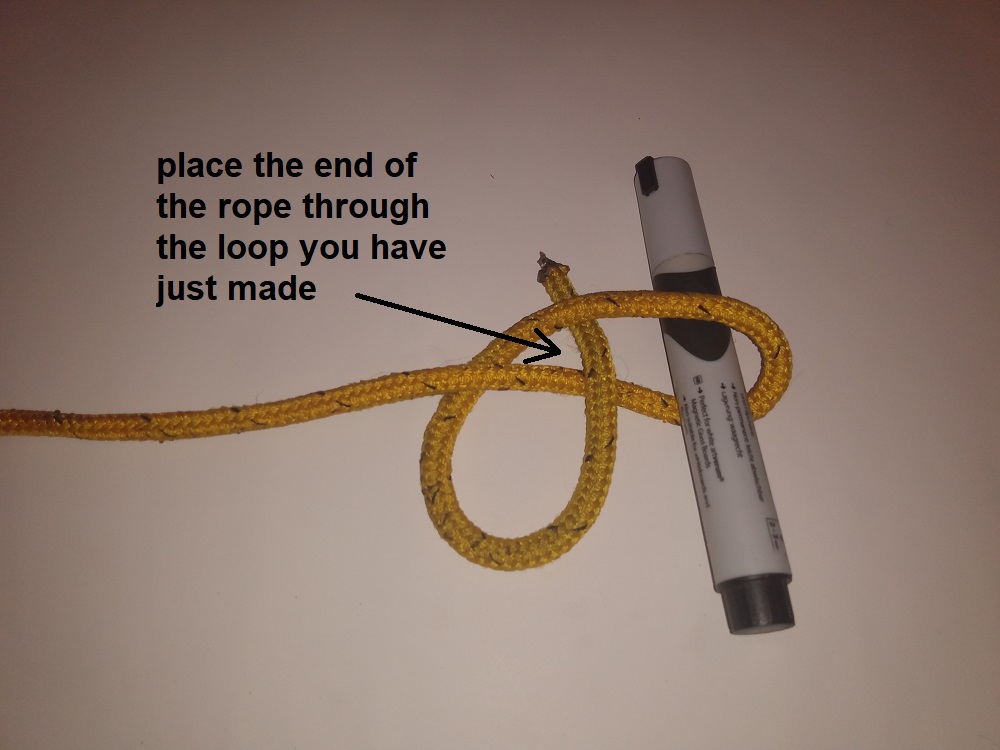
3. Put the end of the rope through the loop you have just made.
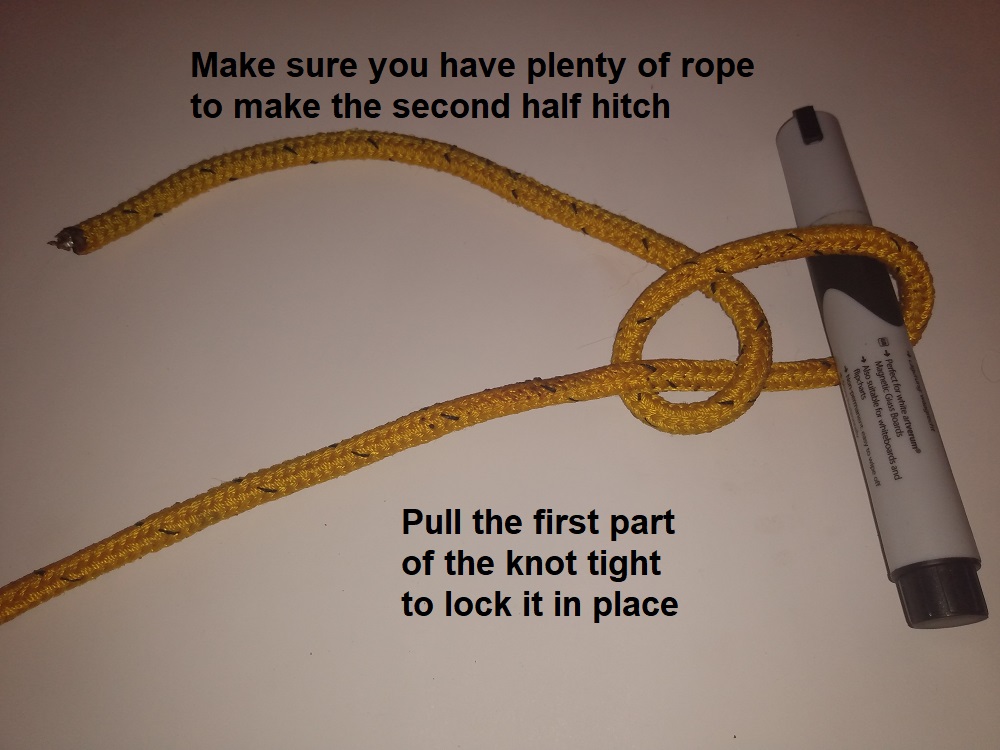
4. Pull it tight making sure you have enough rope left for the second half hitch.
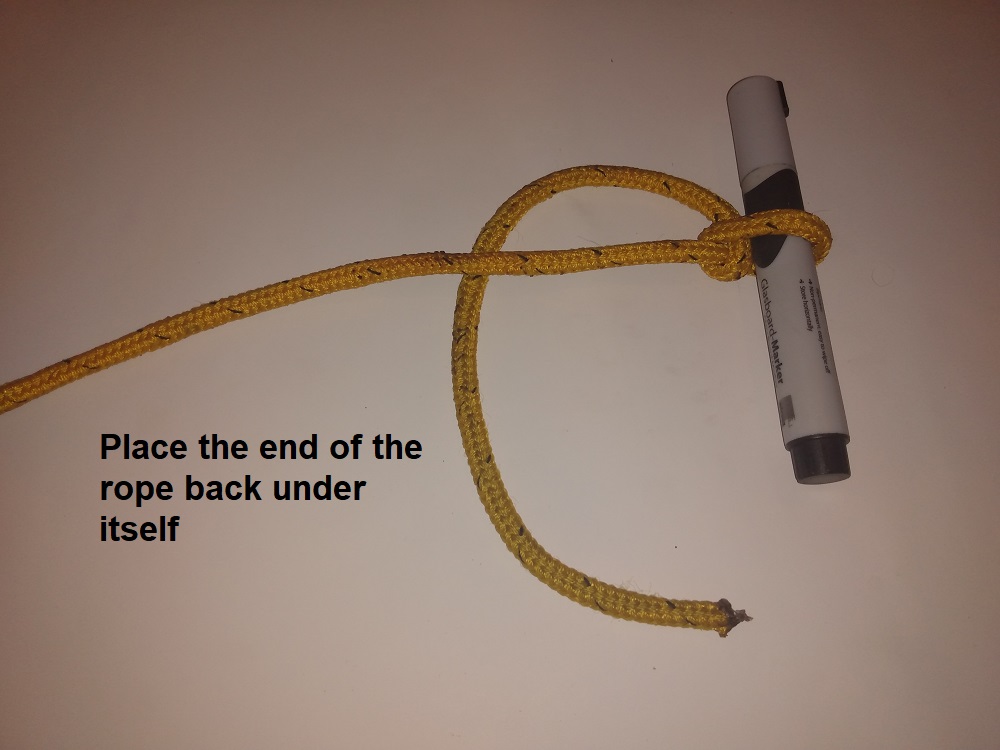
5. Pass the rope under itself again.
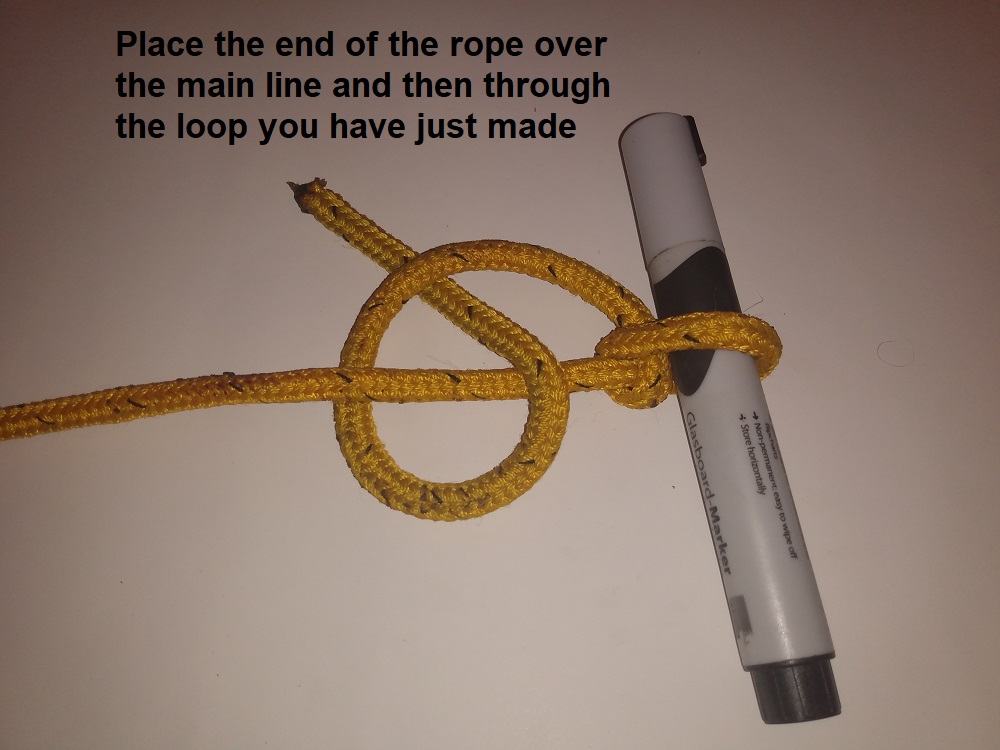
6. Put the rope over the main line and through the loop you have just made.
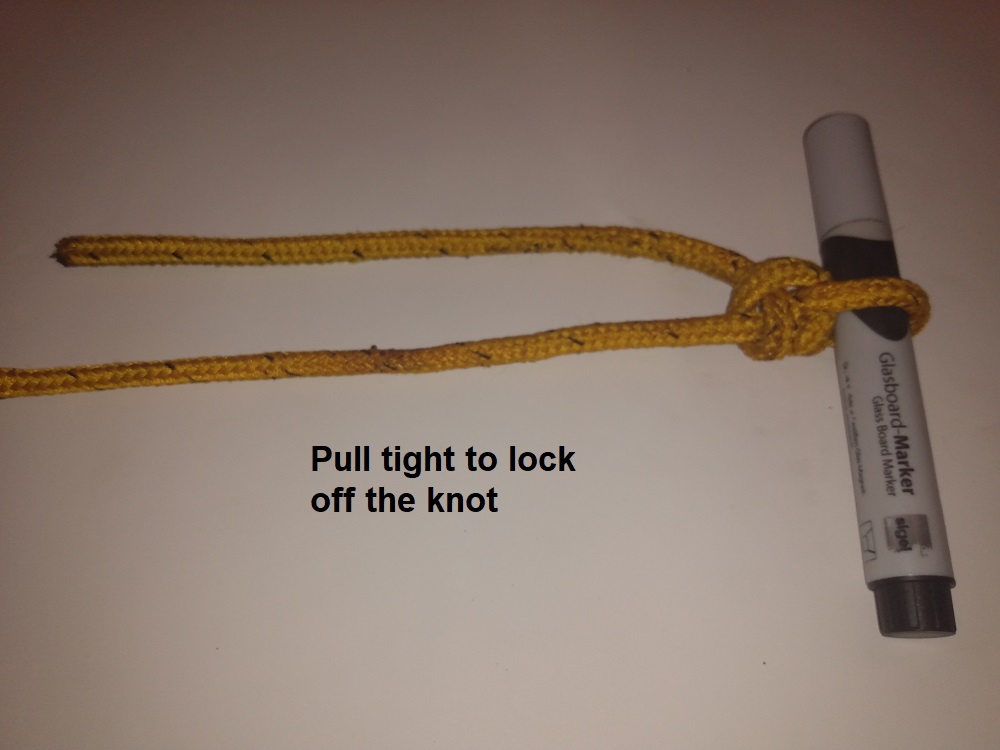
7. Pull it tight to lock off the knot.
Reef knot
(For joining two ends of a single line to bind around an object)
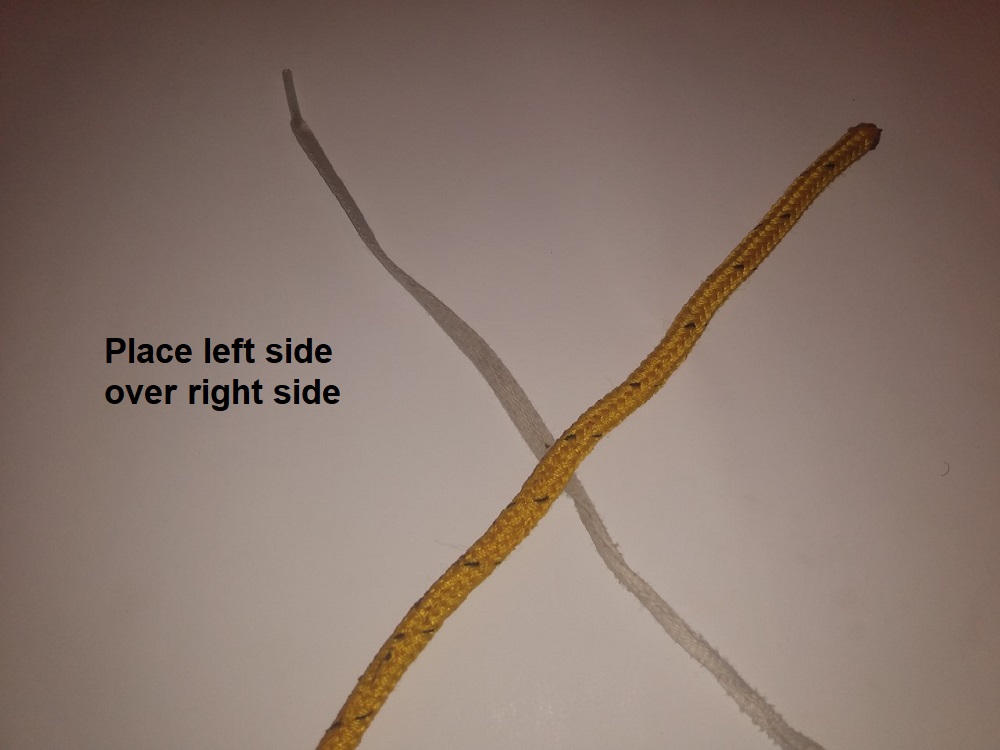
In the pictures, we are using two different ropes to make it easier for you to understand but this would normally be used with just a single rope so you can tie it around an Object.
1. Place the rope in your left hand over the rope in your right hand.
2. And then with the same bit of rope put it around the rope in the other hand.
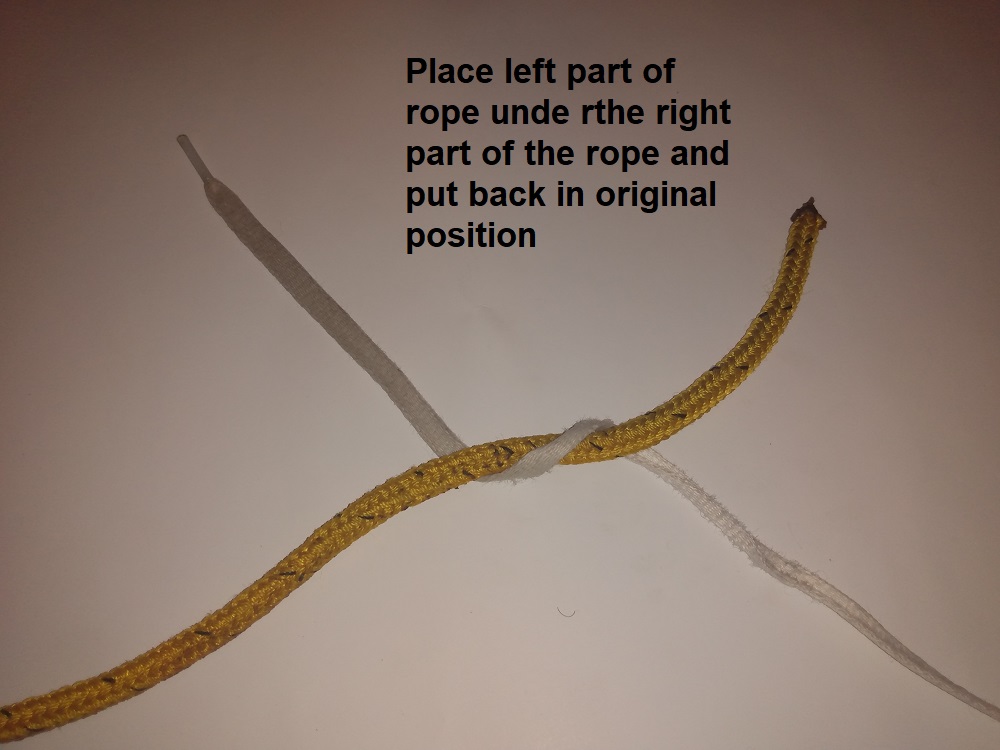
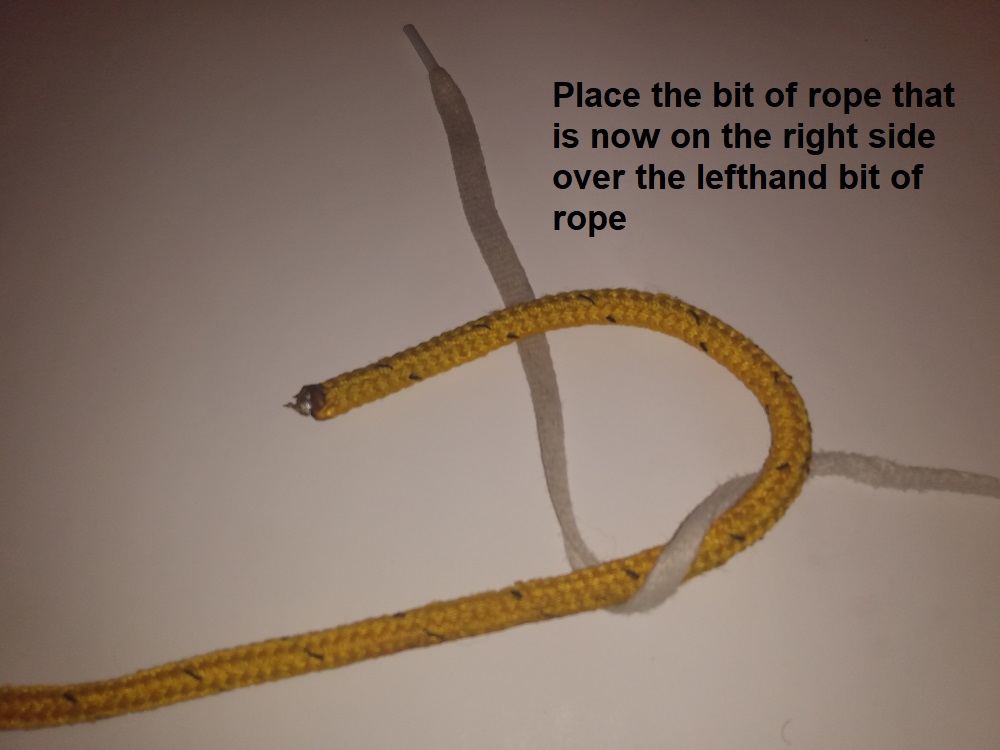
3. Now, place the end which is now in your right hand over the piece of rope in your left hand.
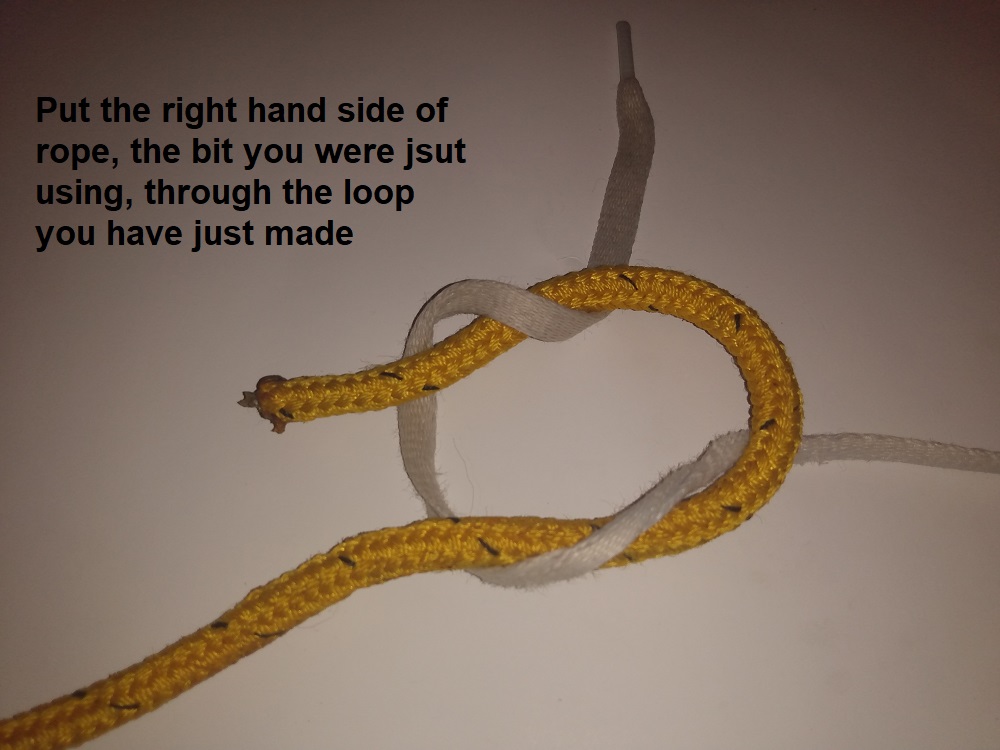
4. The same price of rope goes under and through the loop you have just made in the knot.
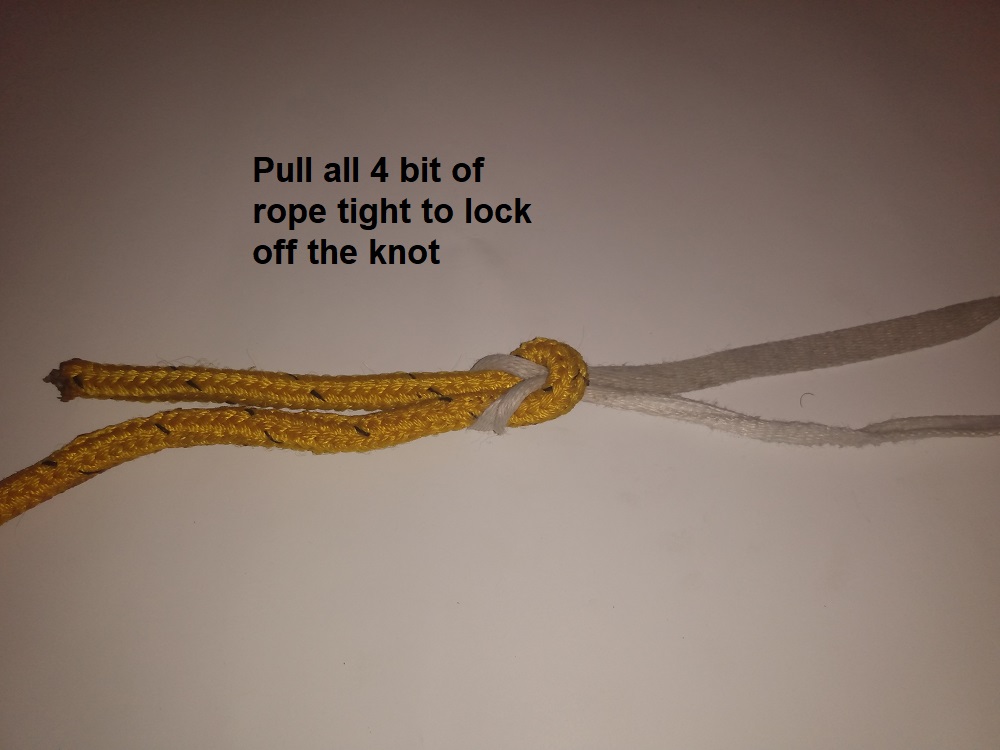
5. pull tight to lock off the knot
If you would like to know more about the padi search and recovery or the PADI Divemaster course you can find the links below
For the PADI Search and Recovery course https://www.underwateradventures.co.uk/padi-search-and-recovery
For the PADi Divemaster course https://www.underwateradventures.co.uk/PADI-divemaster-course
I hope you found this informative and if you would like to watch the video below
Bowline
(for making a fixed loop at the end of a rope)
1. Make a loop in the line going over the top of the main line with the short end.
2. Take the short end and pass it through the loop so it goes under the nearest edge and over the far edge of the loop.
3. Pass the short end under the main piece of rope.
4. Pass the short end back through the initial loop you made.
5. place your hand in the second loop you made to hold it in place and pinch the short end.
6. Pull both the main piece of rope and the short end away from each other to pull the knot tight and there you have a bowline knot.
Sheet bend
(For joining two ropes together)
1. Make a U bend in the larger piece of rope (if the ropes are the same size then it doesn't matter which rope you use).
2 Put one end of the smaller rope under the bend in the larger rope which you just made.
3. Place the smaller rope around and under the two parts of the U in the larger rope.
4. Place the end of the smaller rope under the part of the smaller rope still in the bend but on top of the larger rope.
5. hold all 4 parts of the rope and pull away from each other to tighten the knot.
Two half Hitch knot
(Used to tie a rope to a solid object i.e. metal pole or a tree)
1. Pass the rope under the object you wish to tie it too.
2. Pass the top over the object and back under itself.
3. Put the end of the rope through the loop you have just made.
4. Pull it tight making sure you have enough rope left for the second half hitch.
5. Pass the rope under itself again.
6. Put the rope over the main line and through the loop you have just made.
7. Pull it tight to lock off the knot.
Reef knot
(For joining two ends of a single line to bind around an object)
In the pictures, we are using two different ropes to make it easier for you to understand but this would normally be used with just a single rope so you can tie it around an Object.
1. Place the rope in your left hand over the rope in your right hand.
2. And then with the same bit of rope put it around the rope in the other hand.
3. Now, place the end which is now in your right hand over the piece of rope in your left hand.
4. The same price of rope goes under and through the loop you have just made in the knot.
5. pull tight to lock off the knot
If you would like to know more about the padi search and recovery or the PADI Divemaster course you can find the links below
For the PADI Search and Recovery course https://www.underwateradventures.co.uk/padi-search-and-recovery
For the PADi Divemaster course https://www.underwateradventures.co.uk/PADI-divemaster-course
I hope you found this informative and if you would like to watch the video below